Natural Turf Installation
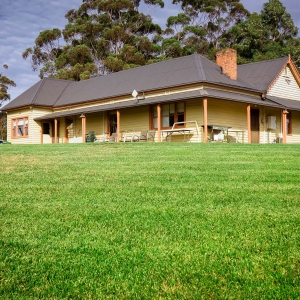
A vibrant, lush lawn can instantly transform your outdoor area. It adds an inviting green ground cover that sets the stage for family picnics, sunrise yoga sessions, backyard cricket or footy and much more! Whether you’re a homeowner dreaming of your perfect patch or a landscaper looking to up your game, this comprehensive guide offers expert advice on all aspects of the process of natural lawn installation, from choosing the right turf and preparing the site to installation and essential maintenance.
How to Choose, Prepare for, and Lay a Natural Grass Turf Lawn
Transforming your outdoor space with natural turf begins with careful planning. Here’s a step-by-step breakdown to ensure success:
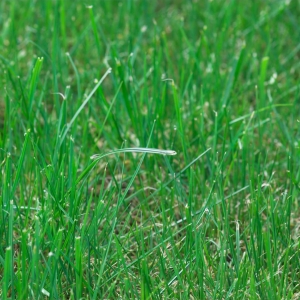
Step 1. Choose Your Turf Type
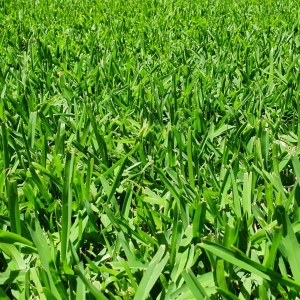
The first step in any natural turf installation project is selecting the right turf variety for your space. Key factors to consider include:
- Climate – Warm-season grasses like Buffalo and Bermuda thrive in Australian summers but slow down in winter. Cool-season types like an RTF Tall Fescue lawn keep growing through the colder months.
- Sunlight levels – As living plants, all turf varieties need some sunlight to thrive. Different types have varying shade tolerance: Buffalo and Zoysia can cope with as little as three hours of direct sun or four to six hours of filtered light, while Eureka Premium VG Kikuyu needs full sun for most of the day to stay healthy. Before choosing your turf, take the time to observe how the sun moves across your lawn area, ideally over different seasons, to get a true picture of how much light the space receives.
- Usage – If your lawn needs to handle heavy foot traffic (either the two-foot or four-paw variety), warm-season grasses like TifTuf Turf Bermuda, Eureka Premium VG Kikuyu and Sir Grange Zoysia are ideal. They’re tough, quick to recover, and perfect for busy backyards. Cool-season natural turf options like RTF Tall Fescue are less durable and can struggle under constant use.
- Maintenance needs – TifTuf Bermuda is a great option thanks to its unbeatable drought tolerance and minimal requirements for fertilising and herbicides. These qualities more than make up for the occasional mowing required to tame its robust growth. Sir Walter DNA-Certified Buffalo is another good option, requiring less mowing, watering and fertilising than most grass varieties.
You are not alone in your decision. Our expert team is ready to help you choose the right natural grass turf for your yard from so many quality options.
Step 2. Measure Your Outdoor Area and Order Your Turf
Once you’ve picked the turf, measure the area to calculate how much turf you’ll need. It’s a good idea to overestimate slightly to account for odd shapes (like garden beds) or trimming errors. We recommend adding around an extra 5%.
If your yard isn’t a standard rectangular layout, sketch it out on paper, breaking it up into its constituent shapes (squares, rectangles, triangles, semicircles). Then use our handy turf calculator to ascertain the exact area in square metres.
All of our instant turf comes in slabs, each roughly 0.5m2, measuring 1.25m long by 0.4m wide. Simply select your desired quantity in square metres. For orders under 30m2, contact our sales team on 1800 622 455.
Step 3. Prepare the Site
Proper site preparation lays the groundwork for effective topsoil and turf installation. Depending on how much work your site needs, this step can be one of the most labour-intensive parts of the job. Homeowners might want to consider enlisting help from a professional or friends/family.
- Clear the area: Remove any existing vegetation and weeds. Spray herbicides if necessary, then wait 1–2 weeks before proceeding. You may need to remove the top layer to bring in a more suitable base layer. We recommend 100-150mm of a good quality sandy loam top soil, available from your local garden supply centre, for optimal root establishment.
- Establish drainage: If the ground tends to retain excess moisture, consider levelling or stormwater pipes or French drains to prevent waterlogging.
At this stage, envision your final lawn layout and check that the surface is ready for turf installation.
Step 4. Apply Turf Underlay & Level
Healthy dirt is the foundation for a long and healthy lawn life. To give your new grass its best possible start, the simplest and most effective approach is to ensure it has a quality base to grow in.
For most sites, we recommend clearing the area and then spreading a layer of sandy loam to a depth of 150mm. This new topsoil provides the ideal foundation for your lawn to establish a deep root system, which in turn boosts nutrition and helps retain essential moisture.
Once your underlay is down, you can use a rake or a soil screed to level the surface, checking it with a spirit level in both directions for even better results. A smooth, even base is crucial as any bumps or dips can lead to an uneven finish and may cause scalping when you mow.
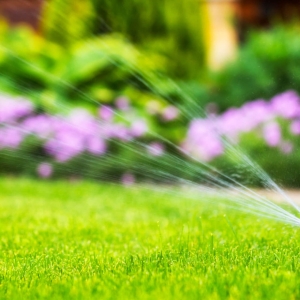
Step 5. Install an Irrigation System (Optional)
The best way to ensure that you maintain a healthy lawn is by installing an automatic irrigation system.There are big benefits of investing in in-ground sprinklers:
- Set and forget – Sprinklers can be set on a timer so you don’t need to worry about turning on the tap, or asking a neighbour to help out if you go away on holidays.
- Superior coverage – Sprinkler heads and hoses come in a huge range of options for spray pattern and water pressure, meaning every blade of grass gets sufficiently wet regardless of your site’s size and shape.
If you’d prefer to avoid the extra work and cost of installing irrigation, that’s fine, just remember you’ll need to water by hand using a hose gun or a sprinkler, which takes time and regular effort. With this in mind, a little extra work before installing your lawn can save you a lot of hassle in the long run.
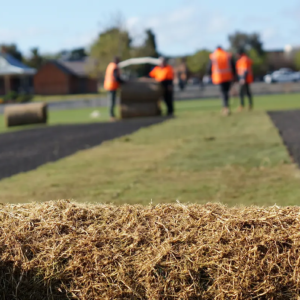
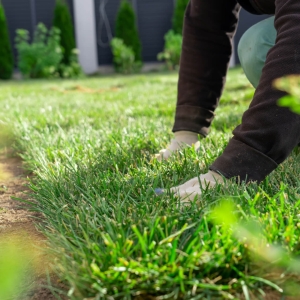
Step 6. Lay Your Turf
Finally, the exciting part! Follow these tips to lay your natural grass turf effectively:
- Apply lawn starter fertiliser – Spread a slow-release fertiliser across the surface before installation. All orders above 30m2 will come with starter fertiliser. This will provide essential nutrients for your new turf to thrive.
- Start immediately – Lay your turf rolls or slabs as soon as they arrive to preserve freshness.
- Line up the turf – Begin at a straight edge, laying each strip with the edges butted together snugly. Stagger the joints in a brickwork pattern to avoid weak lines.
- Encourage good root contact – Once the turf is laid, walk on it or use a roller to gently press the turf down. This helps the grass roots make good contact with the soil, promoting better establishment.
- Water thoroughly – Immediately after laying, water the turf generously (at least 25mm) to help it settle and bond with the soil.
Pro tip: Avoid laying turf in extremely hot weather, as these conditions can stress the grass.

Caring for Your New Lawn
Laying instant lawn is just the beginning. Proper care in the first few weeks and beyond ensures your lawn stays healthy and resilient.
The First Few Weeks
For newly laid turf, the first 2–3 weeks after turf installation are crucial:
- Frequent watering – Keep the soil and turf moist throughout the day. Water at least once daily, or twice on hot days. Adjust frequency based on seasonal temperatures.
- Limit traffic – Avoid walking, mowing, or heavy foot traffic on the lawn until the roots are firmly established.
- Edge trimming – If excess edges lift or fray, trim them gently to improve the lawn’s appearance.
Ongoing Establishment Care
Once your turf begins to root into the soil, it’s time to transition to a slightly lighter, but still attentive, care routine to safeguard future lawn health.
Watering
After the first 2–3 weeks, you can gradually reduce watering frequency. Shift from daily watering to a deeper soak every 2–3 days, depending on weather. The goal is to encourage the roots to grow deeper in search of moisture, making the lawn stronger and more drought-tolerant.
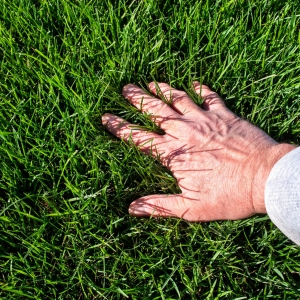
Mowing
Once your turf reaches around 8–10 cm tall and shows signs of firm rooting (you can’t pull the turf up any more), it’s safe for the first mow. Always set the mower blades high and only remove the top third of the leaf to avoid shocking the grass. Some fast-growing types like TifTuf Bermuda might be ready even earlier.
Fertilising
About six weeks after installation, once the lawn is actively growing, apply your first round of slow-release fertiliser. We recommend LSA Premium Fertiliser, available from StrathAyr, to encourage thick, healthy coverage without promoting excessive thatch.
Weeds and Pests
At this early stage, your lawn is still filling in, so keep an eye out for weeds trying to get a foothold. Hand removal is best at this early stage to avoid damaging your new lawn. Preventative pest control usually isn’t needed yet, but if signs of grubs or insects appear, act quickly to avoid setbacks.

Artificial Turf or Natural Grass – What’s Better for Your Instant Lawn?
A common question many mull over is whether to choose synthetic or natural turf. The artificial option is tempting for many time-poor homeowners who want the colour and comfort of a lawn without the ongoing maintenance involved with a living lawn. Let’s go through some advantages and challenges of both synthetic and natural turf:
Natural Turf
Natural turf gives you the real thing: a living surface that not only looks great but also supports the surrounding environment. With proper care, a natural lawn stays lush year after year and adapts naturally to seasonal changes and for time-poor homeowners a minimal maintenance lawn like Sir Walter DNA Certified Buffalo might be just the thing you’re looking for.
Pros
- Environmentally friendly — absorbs CO₂, releases oxygen and supports biodiversity.
- Naturally cools the surface and surrounding areas, perfect for hot weather.
- Lower initial installation cost compared to synthetic options.
- Can add more value to your property over time.
- Superior aesthetics and feel – There’s an undeniable beauty and sensory appeal to natural grass.
Cons
- Requires ongoing maintenance such as mowing, watering and fertilising.
- Can increase water usage.
Synthetic Turf
An artificial lawn might seem like an easy option, but it has a range of hidden drawbacks and ultimately can’t match the real thing for feel, visual appeal and sustainability.
Pros
- Low-maintenance – no mowing, fertilising or irrigation needed.
- Hard-wearing and durable.
- Maintains a consistent green appearance all year-round if maintained well.
Cons
- Higher upfront cost for synthetic turf installation.
- Environmental concerns – made from non-biodegradable materials which can leach into the ground over time, which is both unsafe and can have severely detrimental effects on soils.
- Can retain heat, becoming uncomfortably hot underfoot during summer up to 40 degrees hotter than natural turf.
- Additional Glare – Some synthetic surfaces can create harsh reflections, making your space uncomfortable on bright days, while natural grass absorbs light.
- Natural turf = natural Play Surface – For families, natural turf is a softer, more forgiving surface for kids and pets to play on, reducing the risk of abrasions and injuries common with harder, artificial materials.
- Can become damaged over time, creating unsightly landscapes and have a high cost to repair.
Should You Add Synthetic Lawn to Your Outdoor Space?
If you prioritise sustainability, comfort and a lush natural feel, natural turf is the clear winner. Artificial turf might suit areas with extreme climates or for those seeking low-maintenance options, but in most cases, we can offer a low maintenance or drought tolerant solution to suit your project.
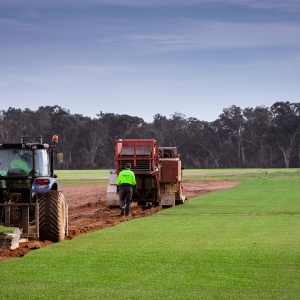
From Big Backyards to Sporting Fields: We’re Leaders Among Natural Turf Suppliers
A thriving natural lawn not only enhances your home but also promotes biodiversity and creates a welcoming, green space for family gatherings or relaxing outdoors. With proper installation and care, your lawn will flourish for years to come.
Excited to lay your new natural grass lawn, school oval or sports field? If you know what variety you like and have determined the quantity required, send us a message for a free quote, and we’ll be in touch shortly.
Natural Grass Installation FAQs
What are the pros and cons of natural turf vs artificial grass?
The benefits of natural turf far outweigh synthetic turf. Natural turf offers an eco-friendly, cool-to-touch and aesthetically pleasing option. However, it requires regular upkeep. Artificial lawn is low-maintenance but may have environmental drawbacks. Also, synthetic turf installation is much more costly than laying real grass.
How long does it take to install a lawn?
Installing a lawn typically takes place within a day of receiving your instant turf order, depending on the size of the area and preparation involved. However, root establishment for natural grass takes 2–3 weeks.
For additional advice, don’t hesitate to contact our experts. As leading natural turf suppliers to Melbourne and Victoria, we can give you the advice you need when only the best results will do.